We fill hundreds of orders everyday that work out perfectly for our customers and their windows. We believe you too, will have perfect windows. However, if you are not completely satisfied with your custom window covering for any reason. Simple as that.
Easy Installation GuIde
Yikes – you don’t want to scratch your trim, poke unnecessary holes in it, or have crooked, awkward-looking blinds. What an embarrassing mess that would be! But here’s the good news: you can install blinds or shades on your own. And no, contrary to what you might hear at other stores, you don’t need to have someone experienced do it for you. You don’t even need experience yourself.
At Blindster, we know buying blinds online is a little different process than you’re used to. That’s why we have measuring and installation guides for every single type of blind we sell online.
So we can’t possibly tell you how to install every type of blind in a single blog post. But let’s take the instructions for one of the more popular kinds of shade people love to buy:
• Premium Light Filtering Double Cellular Shades – instructions with visuals are found here
Estimated Time
It should take you around 15-20 minutes (for blinds/shades requiring 3-4 brackets). The more brackets you have to measure, the longer it takes to install your shade.
What You Need
Here’s the complete list:
• A power drill
• Tape measure
• Pencil
Short, isn’t it?
It’s So Easy – Just 4 Simple Steps!
This is all you do:
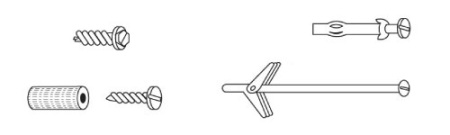 1. Choose the Correct Fastener
1 1/2” #8 hex head wood screws are included. If you’ll be mounting these shades into aluminum or concrete, you will have to purchase your own fasteners.
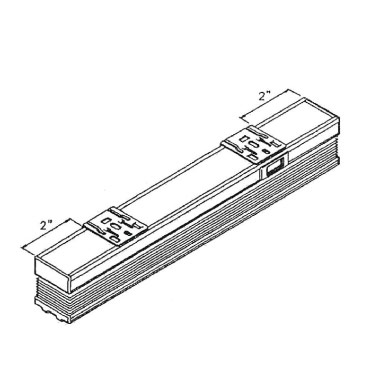 2. Mark the Locations of Your Brackets
They should be about 2” from either end of your headrail. If you have more than 2 brackets, space them evenly between the two outside brackets.
If you have very wide shades, you may get up to 8 brackets. It doesn’t matter how many brackets you get, but do make sure you space them less than 25” apart and as evenly as possible.
If you have an outside mount shade, use a level to check for levelness.
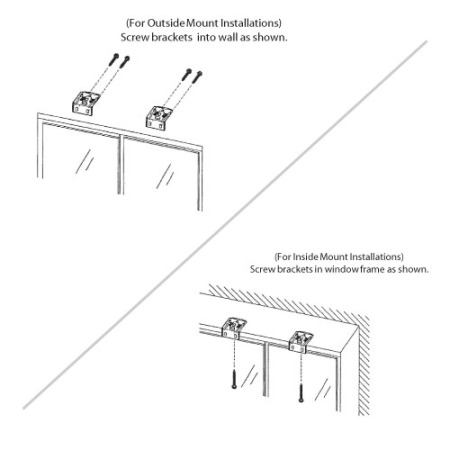 3. Install Your Brackets
For outside mount shades, screw your brackets into your wall. For inside mount shades, screw your brackets into the top or back of your window frame.
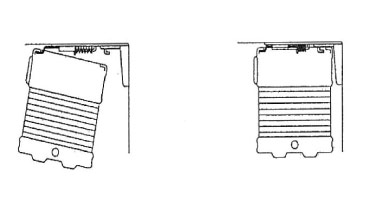 4. Install Your Shade
The front groove of your headrail should be inserted into the front ridge of your bracket. Then, you simply rotate your shade towards your window’s glass.
Your headrail should snap into place without a problem. Double-check just to make sure your shade has locked into place like it should.
5. Enjoy Your Blinds/Shades!
Wow, wasn’t that easy?
See, you don’t have to be a master handyman to install your own blinds.
Anyone with just a little spare time can do it.
Enjoy your shades!
And remember, if you have any problems, you can always contact our friendly customer service team at 888.256.8672 (M-F 8-5 CST).
How to Mesure
- Measure the width, height, and depth in 3 places. For width, use the smallest measurement to the nearest 1/8". For height, use the longest measurement to the nearest 1/8”
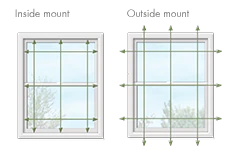
- For inside mounts, we will take any necessary deductions for clearance
- For outside mounts, consider adding overlapping width and height to ensure the entire window is covered
- Use a steel tape measure for accuracy
- Measure all windows, even those that appear to be the same width and height
How to Install
For a perfect look you want to achieve from the window treatments, you must have perfect measurements and have them installed perfectly. After you’ve chosen the right type of window covering, you need to choose the right professionals to measure and install.
- Each window is measured carefully at the top of the window, and depending on the product, it is also measured at the center and bottom. We take into consideration the depth of the window, and if there are any obstacles such as door handles that will get in the way of the operation of the blinds.
- Most windows aren’t perfectly squared, and if the deviation is too big, we might consider an outside of frame mount rather than inside mount.
- Occasionally, when the top of the window frame or ceiling aren’t leveled, the window treatments may not roll up evenly and this results in telescoping that can damage the fabric over time. Our installers have several solutions to deal with this phenomena and correct this issue.
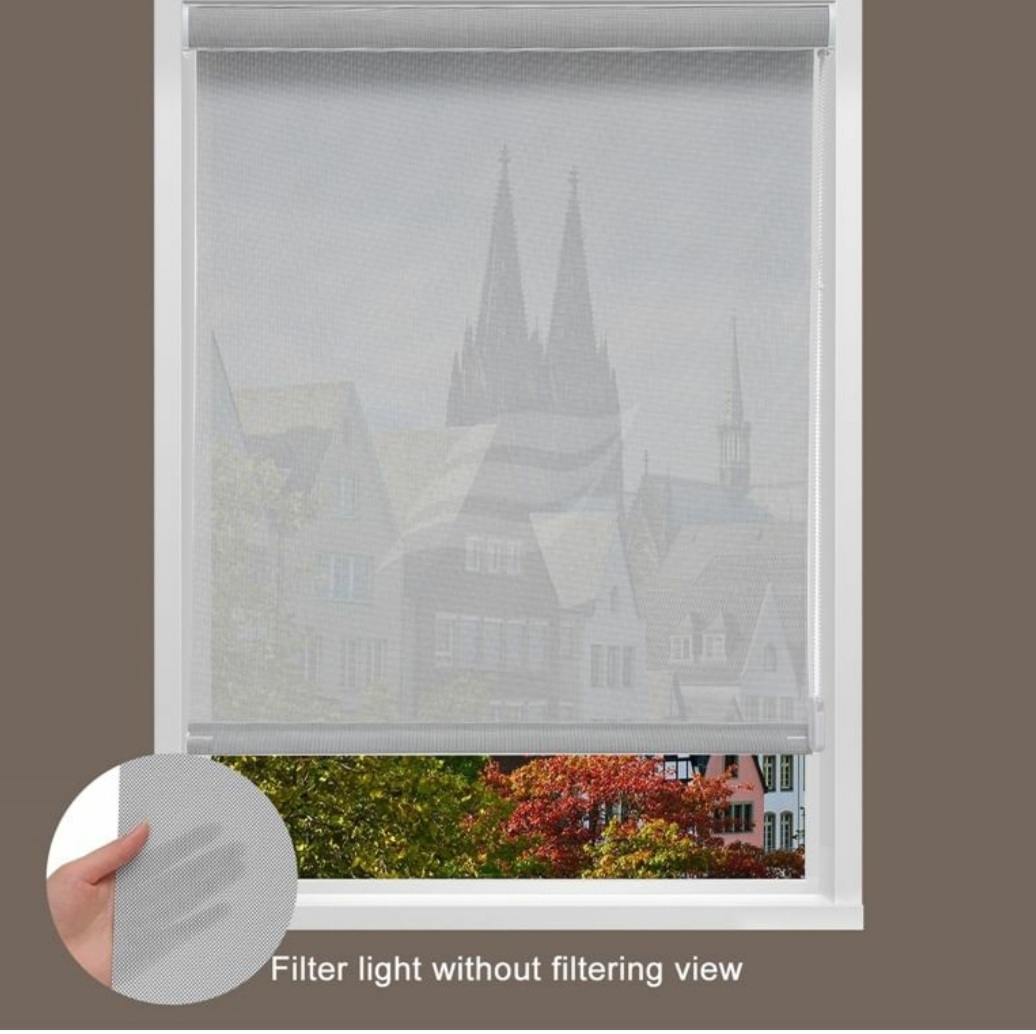
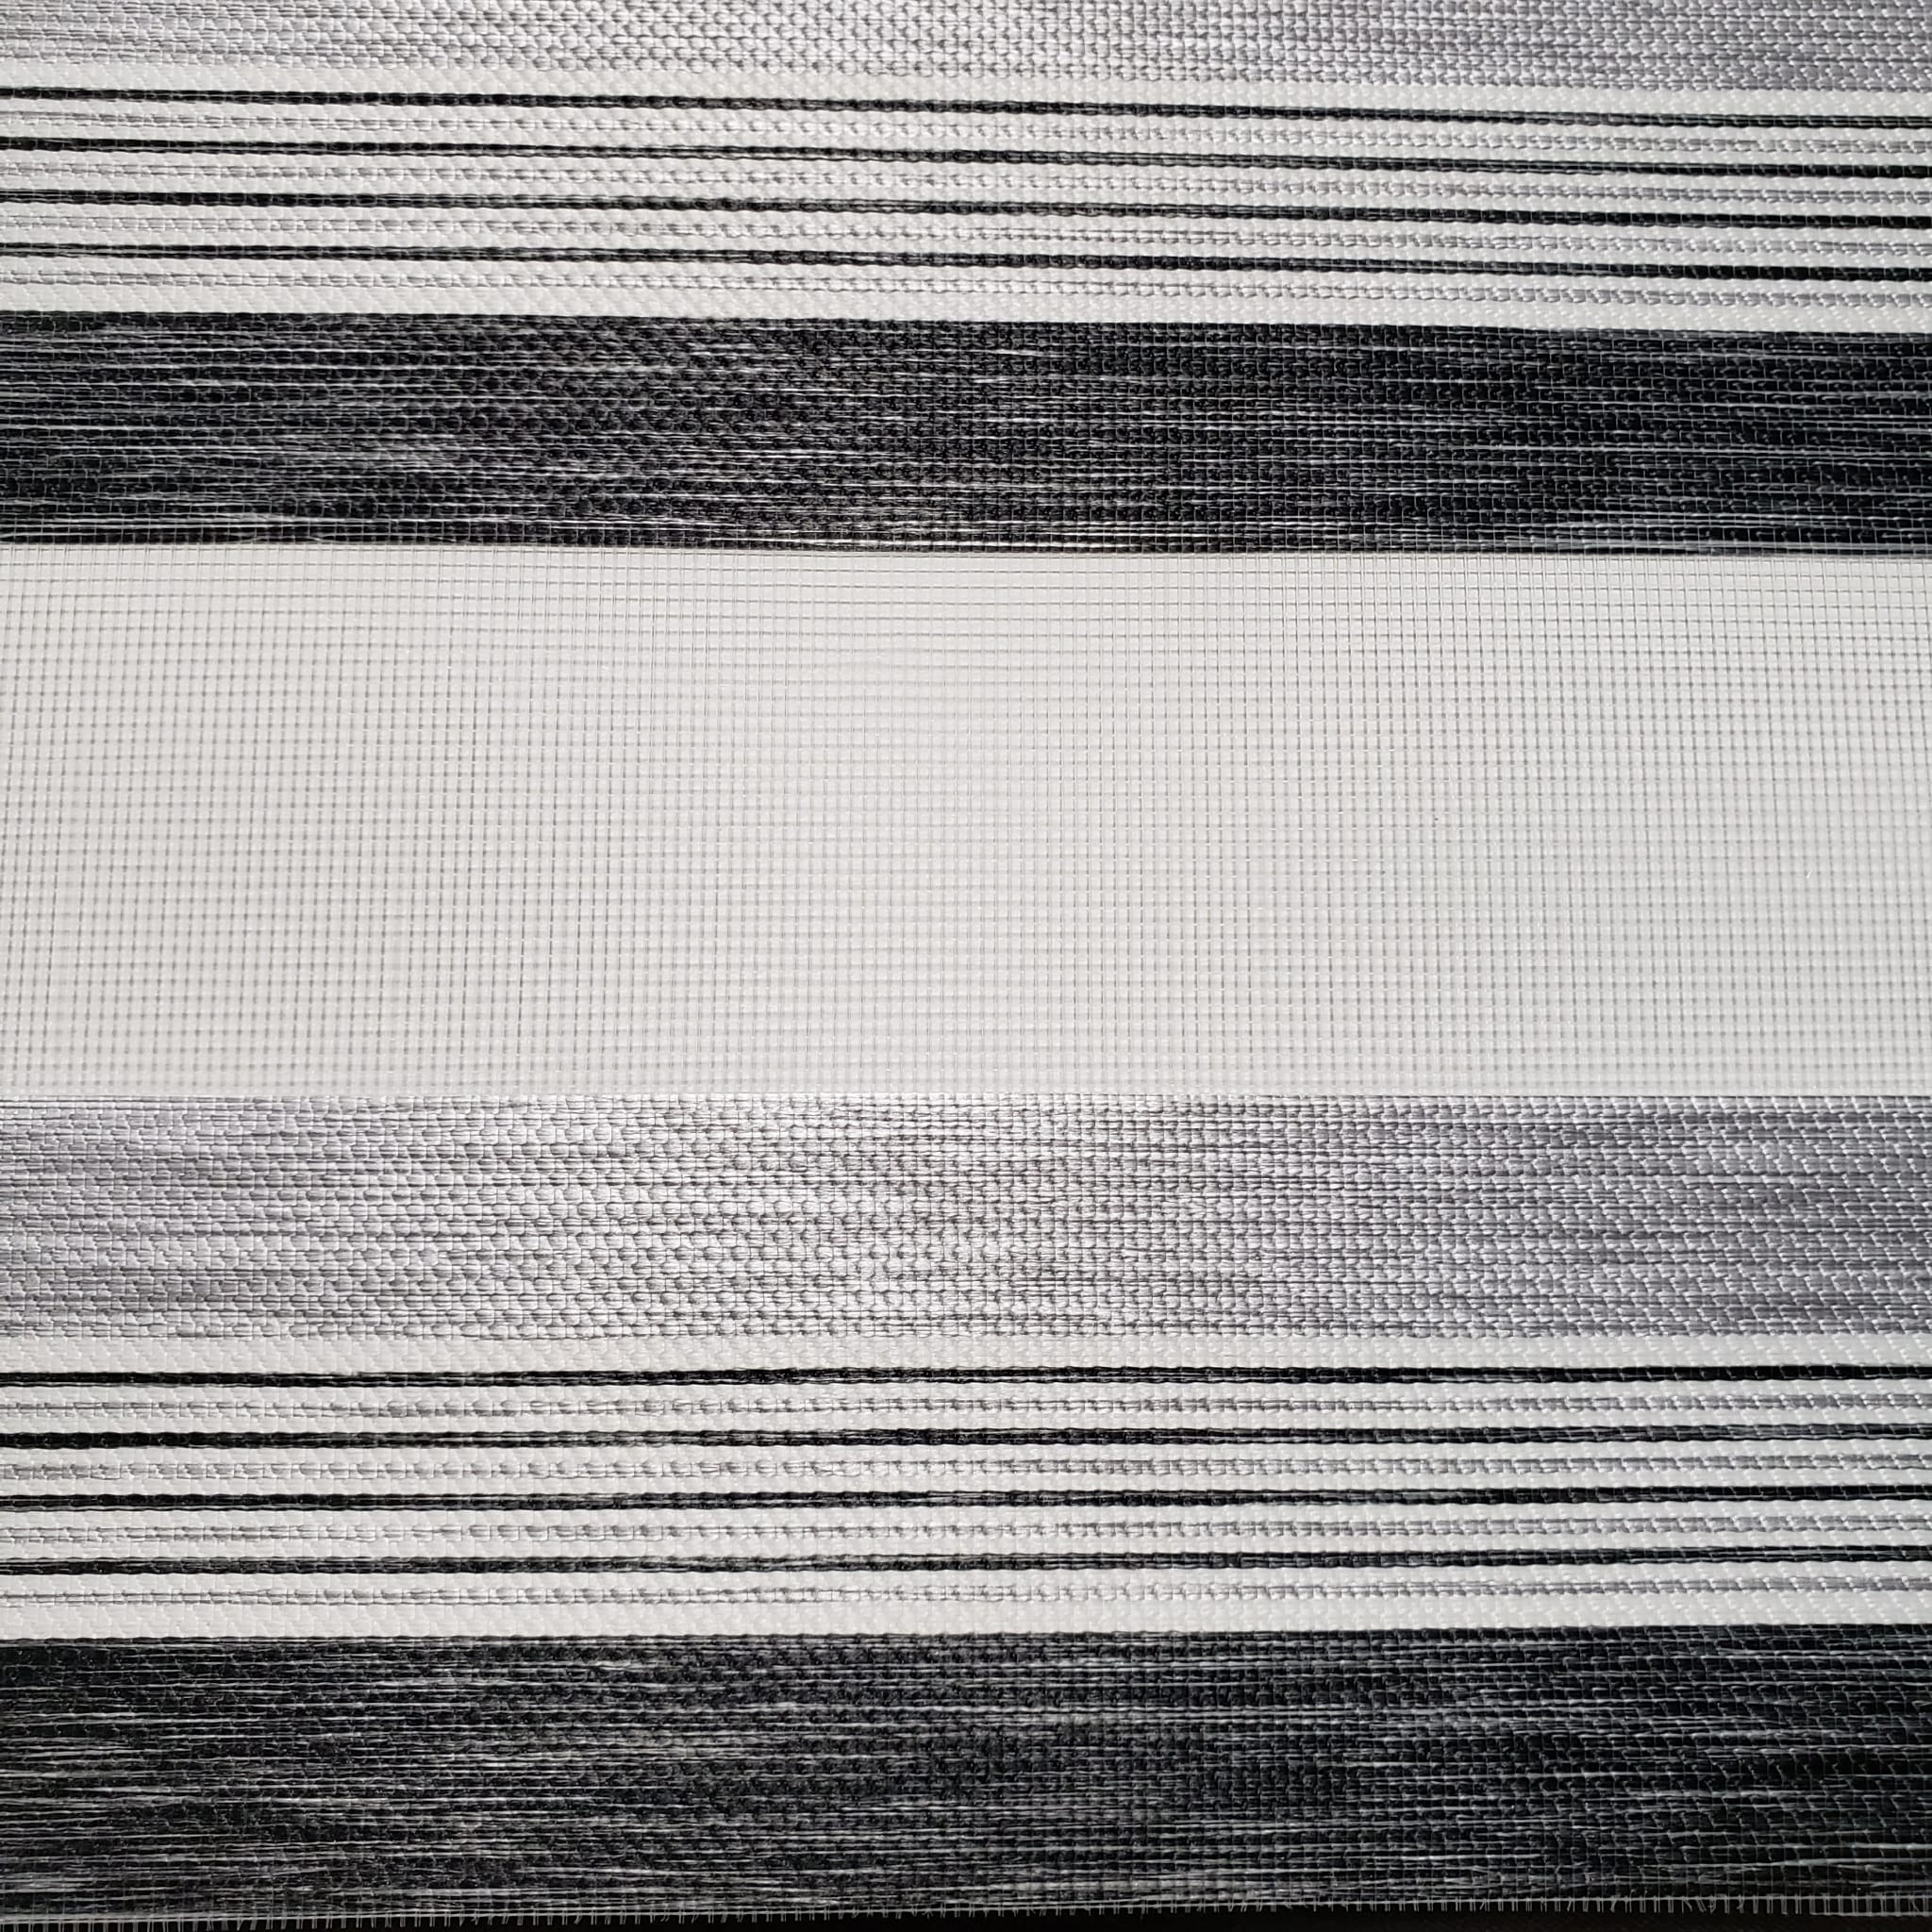
Installatıon Instructıons for Solar Shades
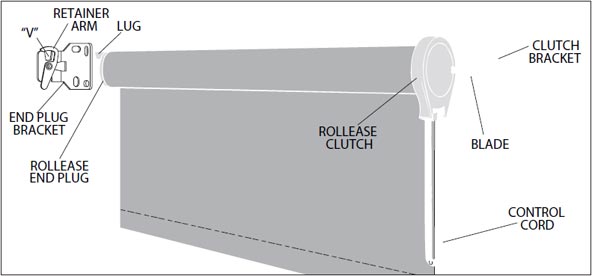
RollEase Roller Shade - Installation Instructions
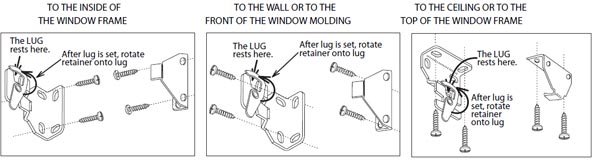
1. MOUNT THE BRACKETS.
If the clutch is on the right end of the shade, attach the brackets to the window frame, window molding, wall or ceiling, as sh own below. If the clutch is on the left end of the shade, reverse the bracket positions, left for right.
 2. INSTALL THE SHADE.
a. Push the clutch straight onto the blade of its bracket. The bottom of the clutch should always point straight down.
b. Lower the lug of the end plug onto the "V" of its bracket. The roller should fit in the brackets securely, with just a little play. Rotate the riveted retainer portion to lock the lugin position.
 3. INSTALL THE TENSION DEVICE
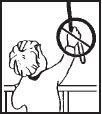
The Tension Device reduces the hazards of strangulation and entanglement of young children by limiting access to the control cord. Anchor the Tension Device, that is attached to the shade?s control cord, to the window frame or wall, so that young children cannot pull the cord around their necks.
a. Lower the shade.
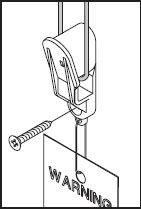
b. Hold the Tension Device upright so the Warning Tag hangs straight down as shown in diagram.
c. Position the Tension Device on the window frame or the wall so that the Tension Device and control cord do not interfere with raising or lowering the shade. The Tension Device should be installed without stretching or pulling down on the control cord. Stretching the cord will cause excessive wear. Do not twist or cross the control cord. If using stop balls, position the tension device 1/ 4 inch higher to allow the stop ball to pass thru the tension device.
d. Holding the Tension Device upright, and in position, as shown, insert and secure the screw through the hole. The mounting screw must be secured into a solid surface or molly.
BlInds RepaIr ServIces
If your blinds are in bad shape, and don’t function well any longer, give us a call for a quick repair. Most repairs are easy, and require just replacing a part. We repair all types of blinds and shades, and service all brands.
How can I place an order?
x2 Lorem Ipsum is simply dummy text of the printing and typesetting industry. Lorem Ipsum has been the industry's standard dummy text ever since the 1500s, when an unknown printer took a galley of type and scrambled it to make a type specimen book. It has survived not only five centuries, but also the leap into electronic typesetting, remaining essentially unchanged. It was popularised in the 1960s with the release of Letraset sheets containing Lorem Ipsum passages, and more recently with desktop publishing software like Aldus PageMaker including versions of Lorem Ipsum.
* No sales tax except for residents of CA and WA.
* Starting price is for 24x36 window treatments.
* Restrictions apply to the Blindsgalore Guarantee. Please see this page for details.